I managed to get a hold of an Acer S271HL monitor from eBay. Was a bargain, paid literally less then a quarter of its retail price including next day delivery. Used one without cosmetic damage on it. The only catch was that it wasn’t 100% functional. Was advertised with a fault, screen flickering. I felt ambitious to repair it and pressed the Buy It Now button.
The Nature Of The Fault
The monitor arrived on the next day and I connected it to my laptop then switched it on. It was 100% working! So I waited a few minutes, half an hour and nothing happened. I watched a movie on it and and there was no sign of any faults. I thought “YES”, they’ve made a mistake and sent me a functional one. I started to use it.
After 2 days of continuous use, the bottom right corner started to turn orange/red color and it slowly spread upwards. Half way through the flickering started.

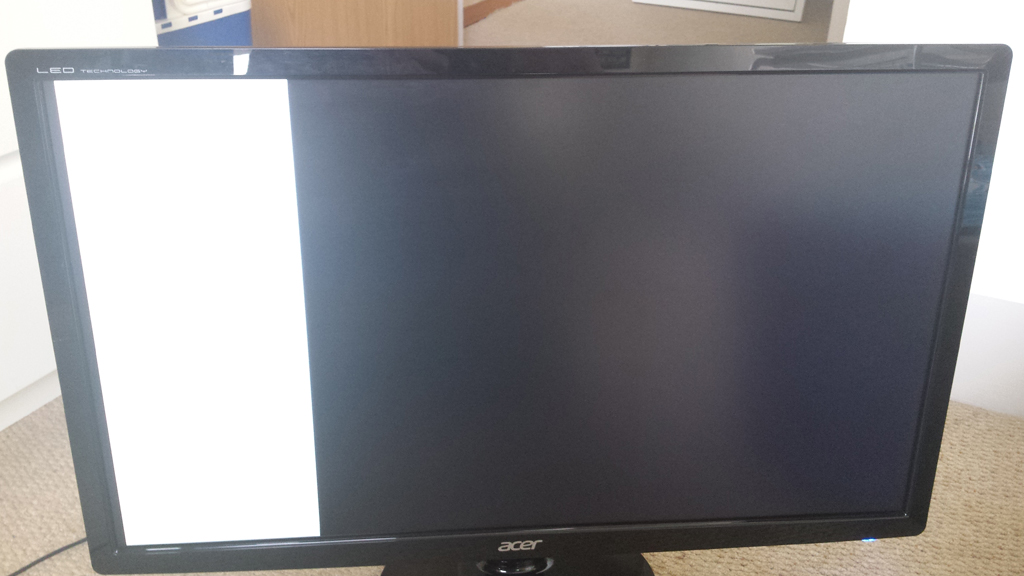
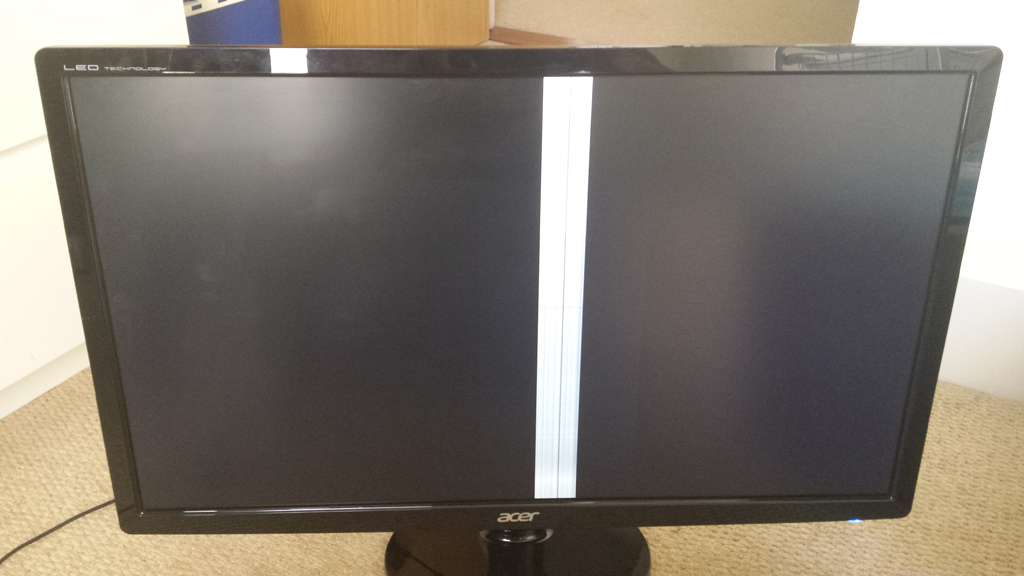
Soon, this stopped and the right part of the screen blanked out leaving the left part bright white, which then changed to a white and black strip.
I didn’t have more time to take the monitor apart, so I left it for a few days. Meanwhile I’ve done a bit of research to find out more about this kind of problem. I found that the flickering is a common issue due to the cheap and not reliable components, specifically the capacitors. The Acer S271HL is (was that time) one of the cheapest monitor on the market. To keep the price low, manufacturers build their products from cheap components.
Before I took the monitor apart, I decided to switch it on to see the problem again. The screen came on and it was operating normally. I waited and waited… Nothing. Finally after 5 hours the problem appeared again just like previously. It was time to take it apart!
Disassembling
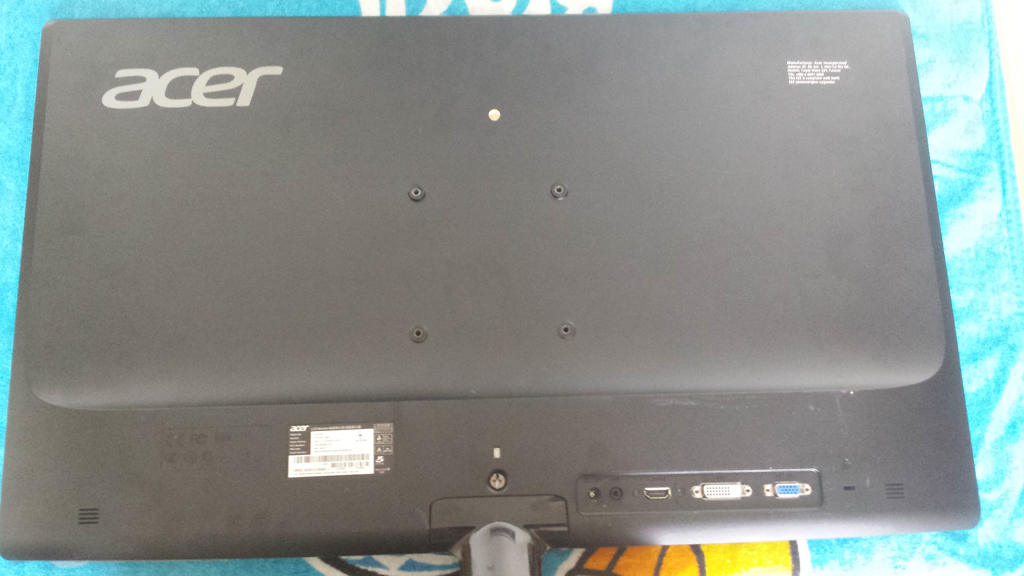
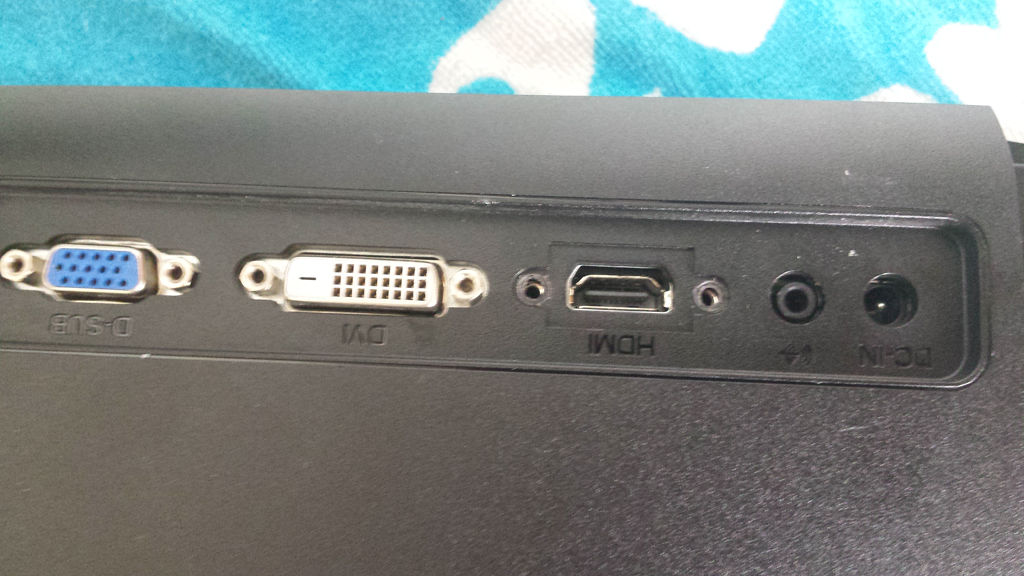
Disassembling the monitor is fairly easy. First need to remove the stand which is held with one screw. Under it there is another screw. Also the two screws of the HDMI connector need to be removed. The DVI and VGA connectors can be left out, they are not attached to the plastic case.
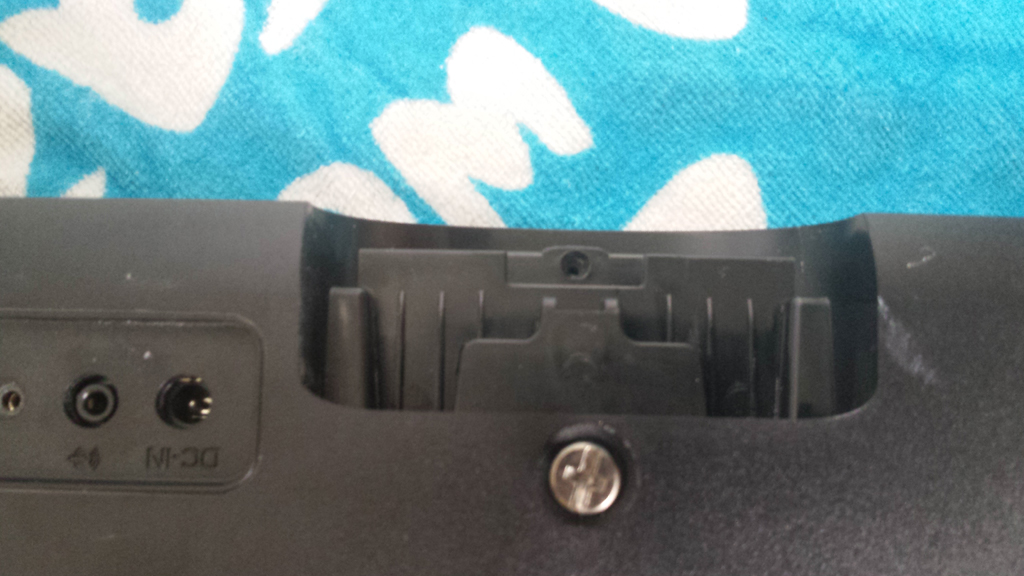
The front and the back of the plastic housing can be separated with a screwdriver or a plastic card starting at one of the bottom corners. Keep the monitor faced down. When its done the main board becomes visible.
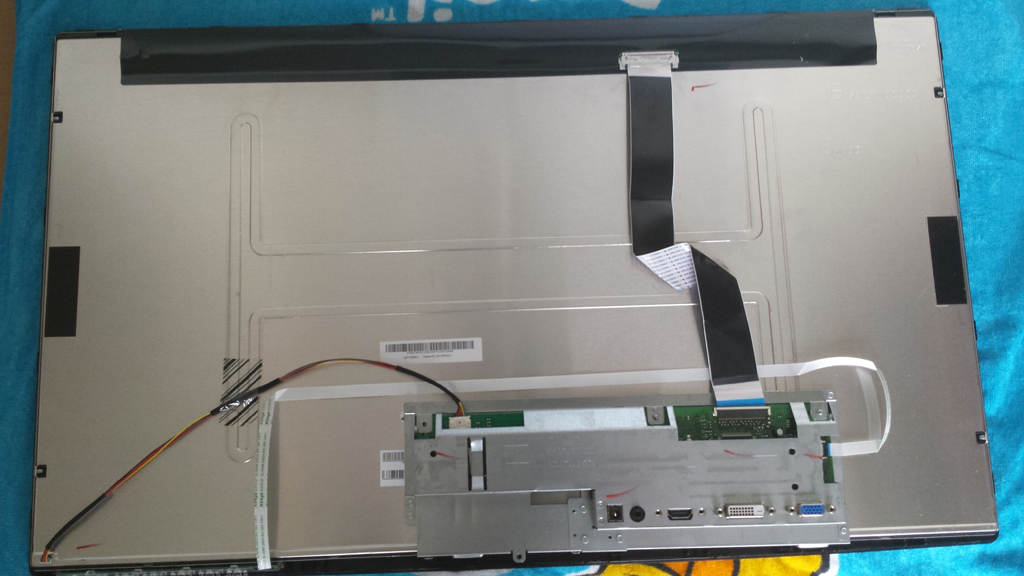
When I had a look I noticed straight away that the LVDS cable (Low-Voltage Differential Signaling) was not connected properly to the main board.


I hoped that by connecting the LVDS cable back was going to solve the problem. I turned the monitor on. It fixed the black & white screen issue, however the flickering stayed.
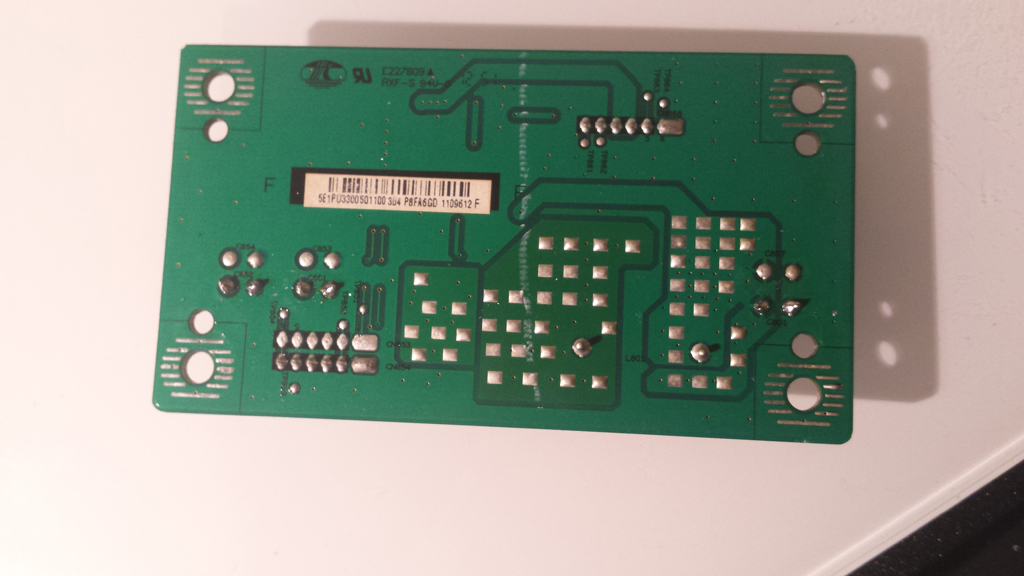
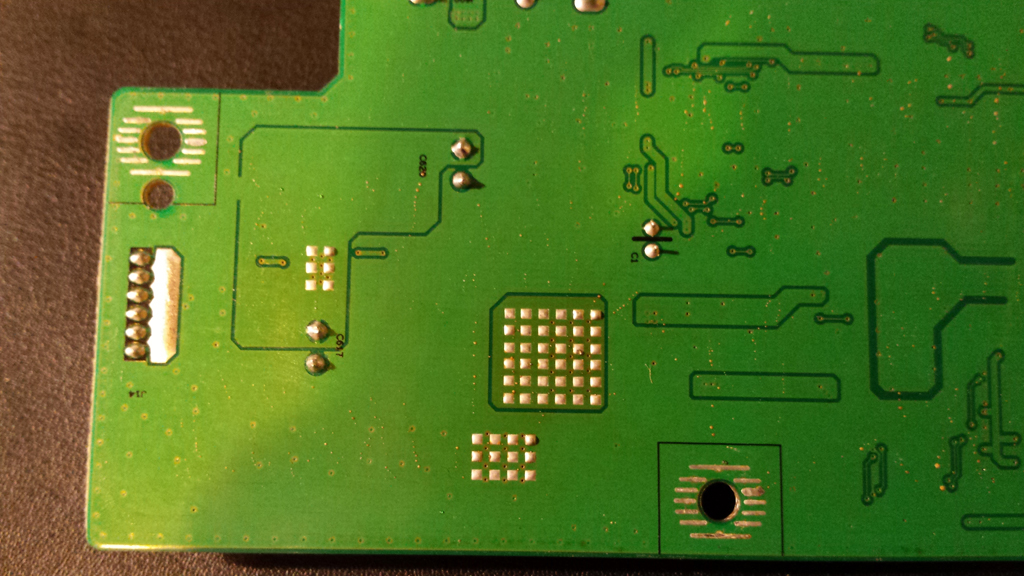
Next, I disconnected all the cables from the main board and had a closer look at the PCB. Looked fine.
Diagnosis & Repair
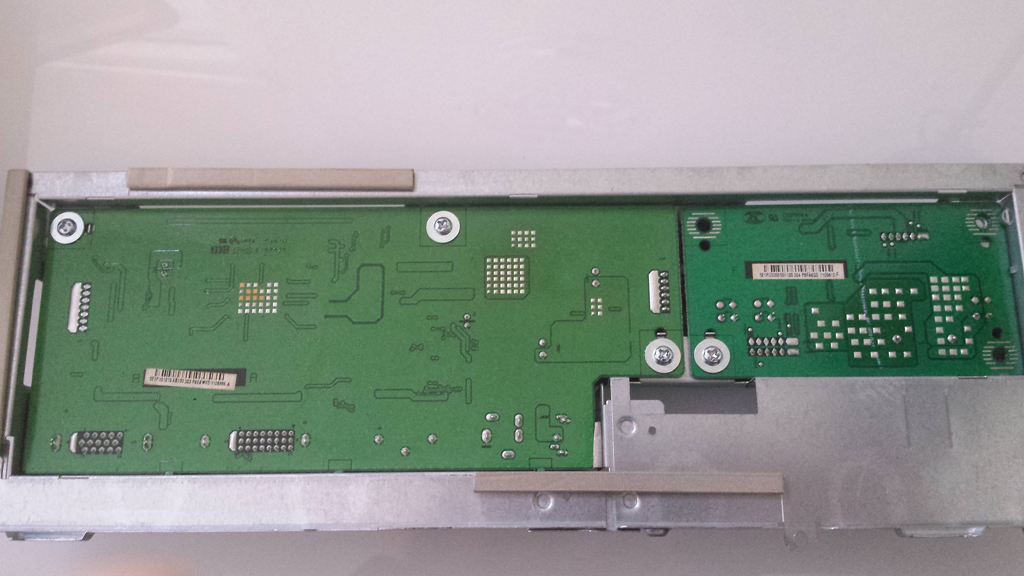
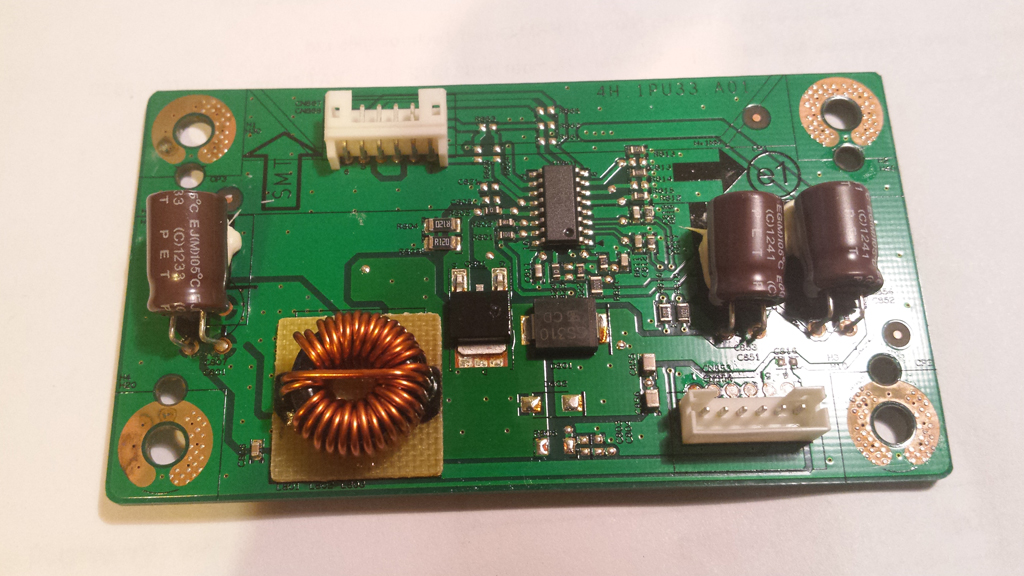
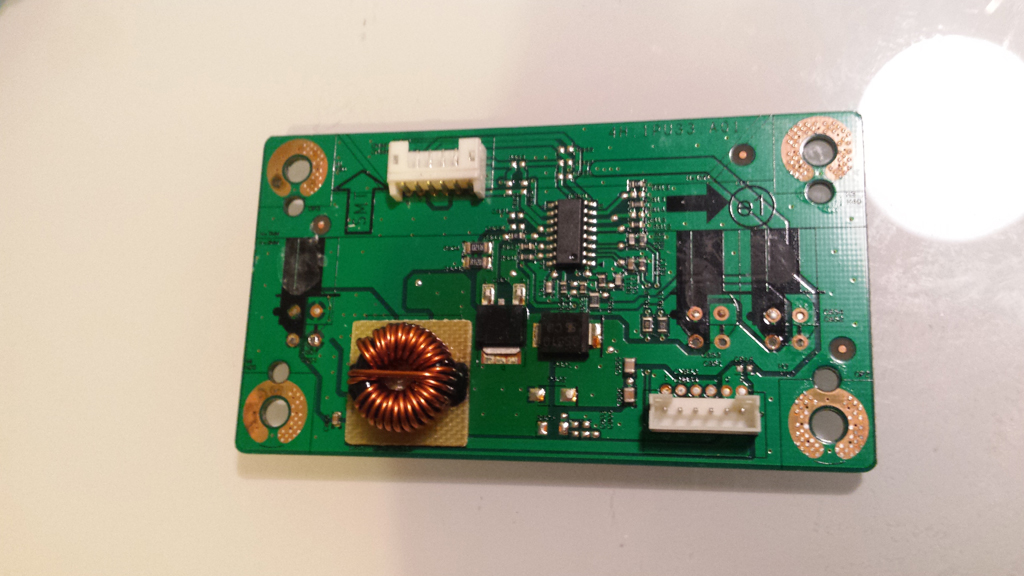
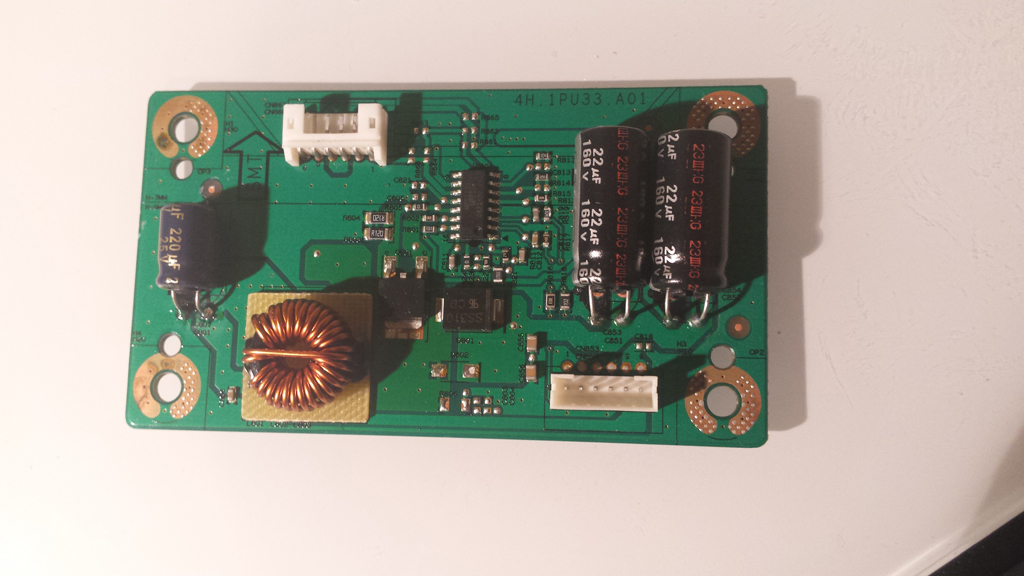
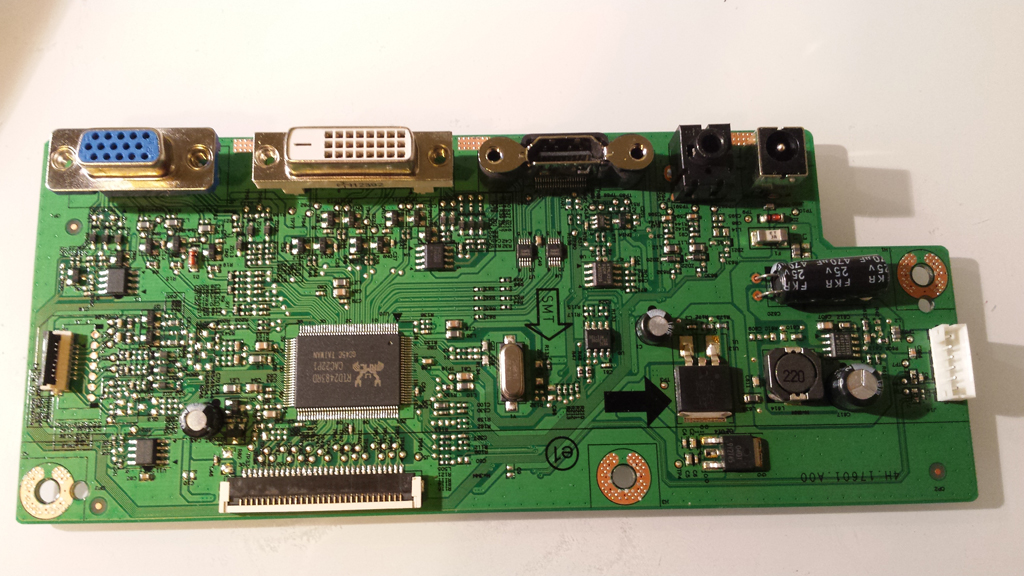
After removing the metal housing, on the top layer there was no sign of visible damage, like a burnt component. There are 2 individual boards connected together with a 6-wire cable. On the left there is the power supply and on the right the LVDS logic board.
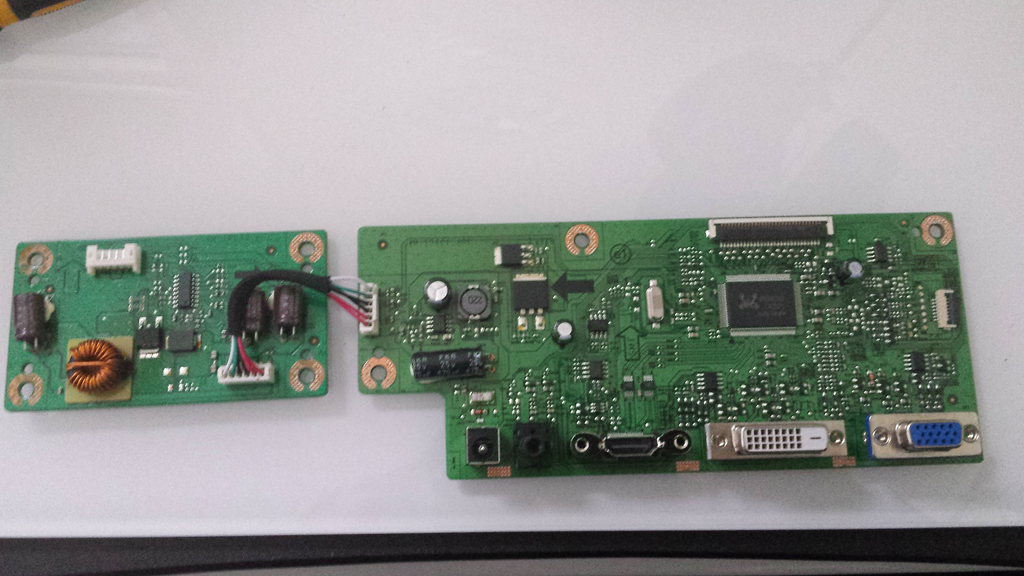
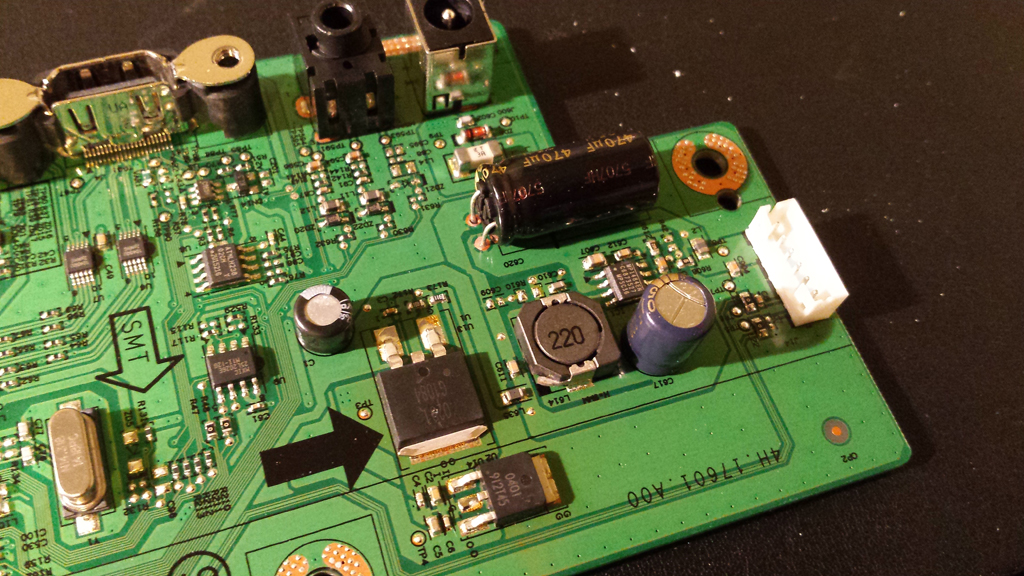
I decided to replace all the bigger capacitors on both PCBs with better quality ones. So went on eBay and ordered 5 Panasonic capacitors with the same microfarad (μF) values. Some capacitors weren’t available with the same voltage rankings. I replaced those with a higher voltage ones. It is ok to use higher voltage ones but not lower ones. Although, I had to be careful because the higher voltage ones are bigger in size. Using too big capacitors and I would have ended up not being able to put the whole monitor back together. The price of the Panasonic capacitors weren’t too bad, however the price of one is the same as 10 cheaper ones.
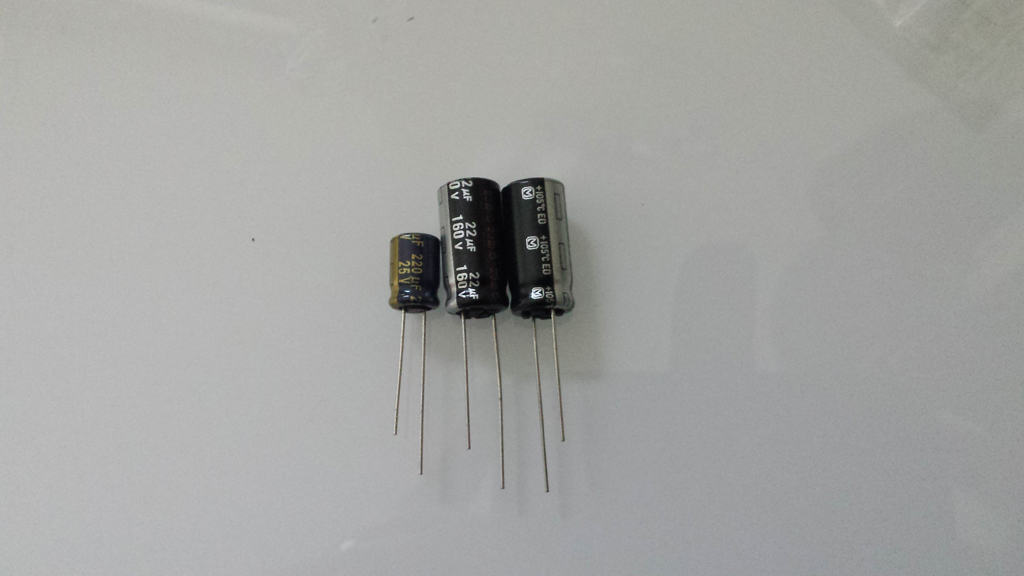
First I started to replace the 3 capacitors on the power supply’s board.

To desolder the capacitors I used a regular soldering iron and a desoldering pump.
I heated up one connection at a time and used the desoldering pump to get rid of the solder. It was a bit tricky as the parts were soldered on the bottom and on the top layers. After I removed most of the solder, I started to move the capacitor. On the bottom layer, I heated the connection on one side meanwhile pulled the capacitor towards to the opposite side and vice versa. It slowly shuffled out.
On to top layer of the PCB I cleaned off the glue, to make it ready for the new capacitors.
As I mentioned earlier I had to be careful with the physical size of the capacitors. They were noticeably bigger and they were just fit under the metal case.
After I finished with the power supply board, it was time for the logic board.
On the LVDS logic board I replaced the 2 big capacitors. The method was the same as before.
When I finished replacing all the parts I put the monitor back together. Connected it to the power supply and to my laptop. I switched it on. The screen came on with a clear picture.
I wasn’t convinced yet. It worked before for a few days so I left it run continuously.
After a week of testing the screen was performing like this:
Crystal clear picture, no flickering or any sign of trouble. IT WORKED!
13 thoughts on “Acer S271HL Monitor Flickering Screen Repair”
I had the same proplem. Replaced all the caps, screen worked perfectly for the next few years.
Now it’s starting to flicker, and then go blank. Powering it off then on again brings it back for a while…
Ho, hum…. back to replacing the caps again. Looks like there is a design flaw here….
Hi,
Can you give me information of C617?
Thank you
I have the same monitor, How can you know the values of the capacitors in mine only say PET 1505 on both power supply capacitors no uf or voltage
I appreciate this is an old post. My psu board is beyond repair. There is no obvious part number for the 2 boards. Would you happen to know the part numbers
The part numbers are:
4H.1PU33.A01
4H.17601.A00
My girlfriend’s monitor went out today. The power button just keeps flickering without any image. The computer still recognizes the screen when it gets plugged in, so there must still be some kind of signal going between them.
I opened up the screen, but just as with yours the caps look alright. There is some discoloration on the back of the board where a cap is located though. Is there a way to send you a picture so you could have a look at it? The discoloration is also on some other parts, but it appears as though yours has it too, albeit less.
Hi Sven,
I can look at it, hopefully be able to identify the problem. I’ve sent you a private message with my email where you can send the pictures to.
Just finished the repair, replaced all caps (even though it probably only was caused by one) and the screen’s up and running again. $3 Repair for a monitor that still goes between $150 and $200 on Amazon. Thanks for this wonderful tutorial and the help.
Got the same monitor, replaced the caps that you showed in this blog. Worked great for about 3 months. But now its doing exactly what Sven said his did. The power button flickers and then goes orange and that goes back and forth flashing. But then if i wait long enough it finally turns on and says “Burn In Right” or something like that. Then once i plug my monitor back in its works… I’m clueless!
I have completed the repair on my S271HL,
i have replaced all 7 Capacitors.
Had a Dead short and Bulge on the big 25v 470uf (FKR) on the LVDS Board.
The monitor is now working fine, and fuctions as normal :) .
Desoldering the PCB is difficult, and time (cups of tea) and patients,
is required to remove the remaing solder, (2 hours)
So Good quality Desolder wick is needed, and a fine tipped iron,
i used higher voltage caps IE 35v, instead of 25v, on the LVDS board,
apart from C617, indentical replacement but high quality.
The monitor construction is a touch Flimsy,
it has a very thin metal Bezel around the bare 27 inch LCD Glass,
i did notice the LCD Glass move very slighty, so be carfull moving the bare LCD panel.
The PSU is foil taped ! to the back of the LCD, with no real fixing to hold it in place,
until the ABS black case is refitted, and the small screws are fitted to the input sockets,
Use a credit card or simlar, to snap apart the Black casing,
start from the base of the lcd, where the stand fits,
Thanks OP for the time you took to make this article.
M3XMR.
Where did you get your capacitors?
I’ve bought them from eBay from various sellers
Fabulous information, i have the exact same model Acer S271HL,
bought from new 7 years ago @ £230.
My fault is, the power button flashes blue / yellow constantly , and wont come out of stand by,
it does eventually start up !, but its starting to take around a minute of flashing blue / yellow cycle before it does,
hopefully its the capacitors, or the Regulator, on the PSU side,
as for the last 2 years, its been On nearly 24/7 as a CCTV monitor.
but mine has an incredibly bright!
back light, and has been used mostly on its dimmest,
back-light setting, ECO mode, to save my eyes.
19 volts 500-600ma roughly, on the bench PSU, when i decided to see ,
how much power the ECO mode consumed, last summer.
I power mine from a Toshiba laptop charger 19 volt @ 5 Amp,
it runs a little cooler than the OEM 2 Amp switchmode.
i reverted back to the OEM PSU, but it still produces the same fault.
Thanks for the good quality pictures, i shall take some pictures of my attempt fix,
if theres anything interesting,
i`ll replace all the Caps and see what happens…